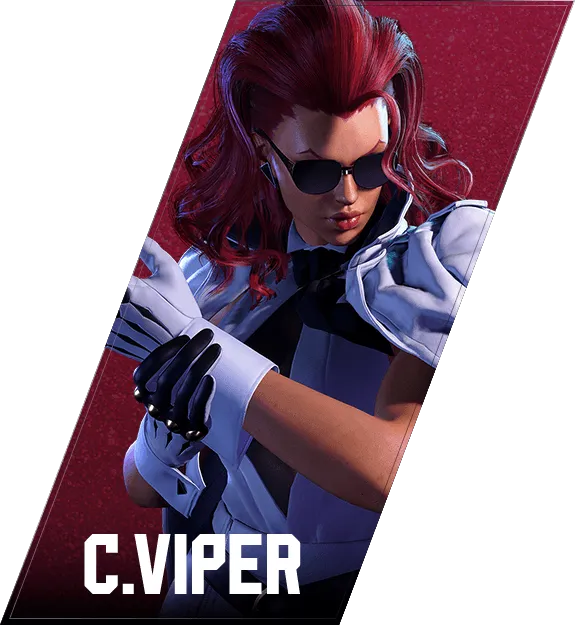

ヴァイパー
C. Viper — 대책
Key Info
- Overhead that combos on late hit:
- 6MP
- Defense
- 214HP: 5F startup, anti-air invincible reversal
- SA1 236236K: 8F startup, no projectile invincibility
- SA2 214214P: 7F startup, projectile invincible
- SA3 214214K: 10F startup, projectile invincible
- Projectile-invincible move:
- 214LP
- Moves that leave C. Viper at advantage on block:
- MP
- 236K→KK
Neutral Game (Focus Points)
- Anti-air consistently
- C. Viper has a weak Drive Rush and approaches with High Jumps and Burning Kick. Committing to anti-air makes her life significantly harder.
- Watch for buffered 623P (Seismic Hammer / feint cancel)
- C. Viper cancels normals into Seismic Hammer (623P) using the feint cancel. After blocking any normal, default to crouch-block to handle the incoming low.
- The embed is -10F on block — punish with a heavy attack.
- Deal with 236K (Burning Kick)
- Burning Kick has aerial properties — use an air-invincible move to knock it out.
- C. Viper is -2F on block; no guaranteed punish on the base move.
- Watch the extensions: KK (Double Burn) leaves her at +2F — do not mash. PP (Chase Knuckle) is heavily negative — punish freely.
- Understand the feint cancel (Thunder Cancel)
- Pressing two punches simultaneously cancels special move recovery.
- After a feint cancel it becomes a strike or throw mixup.
- Use Drive Impact against opponents who over-rely on feint cancels.
- C. Viper has weak defense
- Without Super Art gauge she has no invincible reversal. When you take the offensive turn, press aggressively.
- Target Drive Gauge burnout
- High Jump Cancel consumes Drive Gauge. In long exchanges, baiting out HJC repeatedly can force Burnout.
- Respect 214LP projectile escape
- 214LP passes through fireballs — avoid throwing projectiles at close range.
214P (Thunder Dash)
C. Viper's core special move. Primarily used to end combos.
- 214LP: -3F on block; projectile invincible
- 214MP: -3F on block; safe to embed without confirming
- 214HP: 5F startup, anti-air invincible
- 214P→K: Feint cancel — cancels special move recovery (accessible from nearly any normal)
When the follow-up extension hits:
- 214LP→6PP
- 214MP→6PP: +18F on hit
- 214HP→6PP
Recommended Counter
- 214MP→6PP follow-up: Back wakeup removes the throw mixup. With only +18F after hit, confirm Drive Rush and use a 6F invincible reversal.
- 214LP (projectile escape): Avoid throwing fireballs at close range — 214LP will pass through.
- Feint cancel (214P→K): HJC feint cancel is -2F — no guaranteed punish. Drive Impact is the best answer against opponents who spam feint cancels. After a regular feint cancel it becomes a strike/throw 50-50.
623P (Seismic Hammer)
A low-hitting shockwave through the ground that functions almost like a projectile, but enables combo follow-ups on hit. Accessible from nearly any normal via feint cancel (214P→K).
- 623LP: Short-range earthquake
- 623MP: Mid-range between LP and HP versions
- 623HP: Long-range earthquake
- 623PP (OD): Combo-able from medium normals
Recommended Counter
- Default to crouch-block after any blocked normal — Seismic Hammer embed is common and hard to see visually.
- C. Viper's walk speed is relatively slow, so walk throw is less of a concern.
- When the embed is blocked, C. Viper is -10F — punish immediately with a heavy-normal starter combo.
- Jump over it — Seismic Hammer is a low, so it can be avoided by jumping. If you read the embed, jump in for a full combo.
Warning
The Seismic Hammer embed is visually subtle. Get into the habit of crouch-blocking after any blocked normal. Blocking it gives a major punish opportunity — building this habit is critical.
236K (Burning Kick)
C. Viper's rush move. It has aerial properties, so use an air-invincible move to knock it out. C. Viper is -2F on block; no guaranteed punish on the base move. Watch the extensions.
- 236K→PP (Chase Knuckle): Hit follow-up; C. Viper is heavily negative on block — punish with a light attack
- 236K→KK (Double Burn): Mash-crushing extension; C. Viper is +2F on block at point-blank range — extremely powerful
Recommended Counter
- Neutral jump attack: Aerial property means jumping and attacking deals major damage.
- 236K→PP: Often thrown out on missed confirms — C. Viper is -15F on block, punish with a heavy attack or higher.
- 236K→KK: Drive Impact on reaction after seeing the extension. C. Viper cannot walk shimmy after it.
- Default after blocking 236K: The base move is -2F so a 4F normal technically connects, but the KK extension is a risk. Just Parry the base Burning Kick, or Drive Impact on a confirmed KK extension.
Warning
236K→KK leaves C. Viper at +2F on block. From here her offense restarts — if you see the KK extension, respond with Drive Impact. Without Drive Impact gauge, hold block patiently.
MP
C. Viper's MP is plus on block — a frequently used close-range poke.
Recommended Counter
- Do not press buttons after blocking MP — C. Viper is at advantage.
- Common follow-ups after MP:
- Seismic Hammer (623P) embed → crouch-block
- Throw → tech the throw
- Feint cancel → watch for the next action
- Defaulting to crouch-block after blocking MP is the most reliable response.
6MP
C. Viper's overhead command normal. Connects into combo on late hit.
Recommended Counter
- Startup is relatively slow — react and stand-block on reaction.
- C. Viper is at disadvantage after block — punish immediately.
- If you are primarily crouch-blocking it is easy to get hit by this — stay alert for overheads during okizeme and pressure sequences.
Focus Force (Saving Force)
Equivalent to SF4's Focus Attack — hold to absorb one hit, release for a kick attack.
- Normal version: Armor from frame 6
- OD version: Armor from frame 3
Recommended Counter
- Throw is the most reliable answer — armor loses to throws. Throw on a read beats this cleanly.
- A meaty strike overlapping within 2F of wakeup beats the armor window — with precise timing, treat her as if she has no reversal.
- Crouching MP → Drive Impact on a visible Focus Force is solid — even if armor absorbs the MP, Drive Impact confirms.
Warning
OD version has armor from frame 3 — difficult to deal with on wakeup. Alternate between throws and precise meaty strikes.
High Jump Cancel (HJC)
A mechanic unique to C. Viper. Certain moves can be cancelled into a High Jump, enabling aerial follow-ups. Consumes Drive Gauge, so overuse risks Burnout.
Recommended Counter
- HJC combos include routes such as Seismic Hammer → HJC → Burning Kick. If you see the jump, anti-air immediately.
- Aerial overhead/low mixups from HJC are hard to react to — hold Parry to reduce damage taken.
- HJC costs Drive Gauge — consistently denying easy HJC setups over long exchanges can force Burnout. Making her aware of gauge management is effective.
Warning
During SA1 (Limit Decoupler) install, HJC is free with no gauge cost. After SA1 lands, avoid reckless offense and consider playing for time until the install expires.
Wake-up Pressure on C. Viper
Reversal options and meaty jump-in timings when applying okizeme:
- 214HP (anti-air invincible): 5F startup — 6F meaty jump-in setup beats it
- SA1 236236K (Limit Decoupler): 8F startup — 9F-or-slower meaty beats it
- SA2 214214P (Mission Complete): 7F startup, projectile invincible — 8F-or-slower meaty beats it
- SA3 214214K (Hard Luck Rejector): 10F startup, projectile invincible
- Drive Reversal: Universal system mechanic
Recommended Counter
- 214HP is 5F — a 6F meaty jump-in setup blocks the reversal and lands a meaty.
- If SA2 gauge is stocked: 8F-or-slower meaty beats the 7F startup.
- If SA1 gauge is stocked: 9F-or-slower meaty beats the 8F startup. Note: SA1 on hit puts C. Viper into install state with a large damage boost.
- No gauge: Standard meaty timing is sufficient — mix strike and throw freely.
LPLK (Forward Throw)
C. Viper is at +17F advantage.
- On in-place wakeup: Drive Rush leads to okizeme; confirm Drive Rush and use OD reversal or SA.
- On back wakeup: Distance increases — neutral resets.
Recommended Counter
- In-place wakeup → Drive Rush confirm → respond is the stable option.
- If Drive Rush appears, counter with OD reversal or Super Art.
- Without Drive Rush, watch for feint cancel follow-ups.
- Back wakeup sacrifices stage position but is a safe option to avoid pressure.
4LPLK (Back Throw)
C. Viper is at +15F advantage.
Recommended Counter
- After a back throw, C. Viper's sustained pressure potential is weaker than after a forward throw.
- Take in-place wakeup, confirm Drive Rush, and respond accordingly.
- Stay calm and watch for feint cancel follow-ups.